

Hey all! My summer is half way done (insert crying emoji here) but I'm sooo excited about my new Erin Condren Teacher Planner that came in a couple of weeks ago. This post is going to tell you everything about it, my thoughts, and show you lots of pictures!

$55 is a lot for a planner. I get it but I had just finished the school year and decided to splurge and give myself a little gift for ending the school year alive! HAHA I had a hard time picking my cover but once I saw stripes...I fell in LOVEEE. I love stripes... okay, not love but I'm obsessed! I'm almost always wearing stripes...especially black and white! My planner actually inspired my newly designed blog!

So I ordered my planner using a referral code from someone that commented on their Facebook page...she got a $10 credit and so did I...win/win! Click Here for my referral code, feel free to check them out! The $10 credit made me feel better about my purchase! HAHA
 Can you tell that I'm excited about this beautiful blue box!? One thing I do LOVE about EC (Erin Condren) is their presentation. The box is beautiful and so is the inside of the package!
I mean, check out the gold tissue paper! I'm in loooove! EC also sends a sticker sample book, some referral cards, stickers, and other little things. Everything is printed on such high quality paper/materials. I love the "enjoy" sticker holding it all together!
The package is truly beautiful! Once I took off the gold tissue, I noticed that my planner was wrapped in bubble wrap for extra protection.

Once I opened it up and saw my planner, I was in AWEEE! It was beautiful! I changed the colors of the planner stripes to black and white. I think the default was blue and white but you can customize them to whatever colors you would like! I really like the big pink heart in the middle because who doesn't love hearts!? I got it with my monogram...one thing I wish I could change is to get the monogram in capital letters. I could've requested this change but I honestly thought I would love the lowercase...fail. The lowercase look weird to me but eh, I'll live with it.

Obviously, I'm still happy with it! HA! Now, to check out the inside! The inside cover has a page that can be used with a dry erase or wet erase marker. It can be a to-list or even a list of upcoming important events. This part of the planner is new...my old one did not have this.
 The cover is very sturdy and looks like it will last all year. My old Teacher Planner's cover felt very similar and it did last all year. The lamination did not bend or peel at all.
  The first title page looks very old school to me. The apples are not my favorite. I do wish EC would let us customize the graphics/colors of the inside. On the back of the title page, there's a quote. I love that it's on black and it looks so nice! The next page is an "All About Me" page where you can add info. about yourself, usernames/passwords, and a spot to write in some web resources. I looove this because I always write websites down and then lose the stickies! HAHA This is going to help me be a little bit more organized!
 The next two pages are for Classroom Events/Volunteers and Helpful Hints for the Substitute. I love the space to keep your volunteers' contact information handy. I also love the special events and field trips spot to write in. This will be perfect if you like to plan ahead with your team so you have them all written down. Now, I don't really see myself using the "Helpful Hints for the Sub" page. I'm very Type A about who touches my stuff and I will probably not leave my 50 dollar planner to a sub! HAHA There's a cute little owl there...again, not my favorite clip art...
Then, there is a page with Holidays and dates to remember... I'm not the biggest fan of this page for 2 reasons... Number 1: It has people's birthdays on there that I've never heard before...when I look at them closely, I see that they are authors {I THINK}... not super relevant in my Teacher Planner...Number 2: The dates aren't exact. It has Hanukkah in 2 places (both November and December) I know that some Holidays, the actual date changes but I'd rather have the exact date or no date at all!

There are birthday pages! I do love this section so I can easily see any student or important people's birthdays! <3
 |
| There is an Absentee Log...not a fan of this page just because I don't keep track of my student's absenses, my online gradebook does that! I may use this page for something else though! |

There are a few graphing pages that you can use for whatever you'd like! It has some ideas at the top...

There is a yearly spread so you can plan your year!


Now, look at these tabs!! They are awesome! Nice and sturdy and I love the colors and how they are clearly labeled! These tabs are a HUGE plus! here is a tab for dates, absent, graph, year plan, every month, lessons, and for your checklists. The planner is organized a bit different than my old one. This planner has all of the month spreads together and then the lessons separately. I don't know how I feel about that now but I will let you know once I start using it.

There is also a monthly spread for all of the months! Perfect for important dates/meetings/due dates!
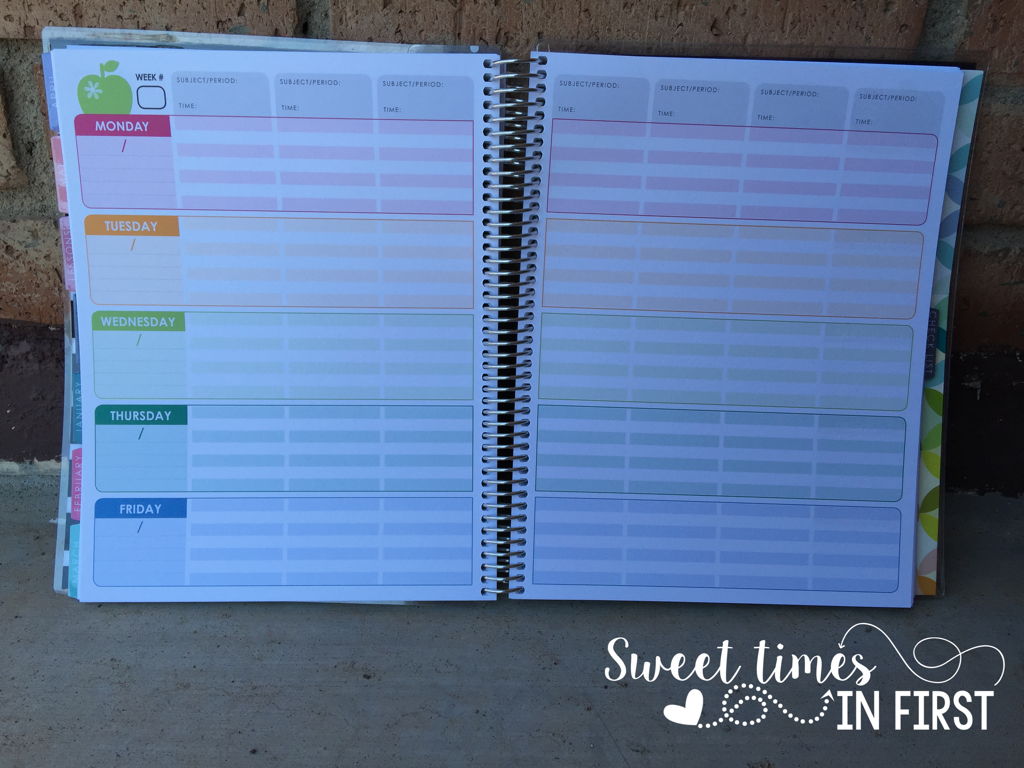
Here are the planning pages. Now, the squares aren't the biggest but I do love the colors! I'm going to use my planner to map out what I want to teach and then input my complete lesson plans into Planbook.com {another blog post coming up!} So, I don't need that much space!
That's my Erin Condren Planner! If you'd like to check them out, I'd love for you to use my referral link: https://www.erincondren.com/referral/invite/sandramatadamas1023 You will get 10 BUCKS OFF!! WINNNN!!!


